PDOStatement::rowCount

prepare( $query );
$stmt->execute( array( $col1, $col2 ) );
print $stmt->rowCount();

echo "\n\n";

$con = null;
$database = "AdventureWorks";
$conn = new PDO( "sqlsrv:server=$server ; Database = $database", "", "");

$query = "select * from Person.ContactType";
$stmt = $conn->prepare( $query, array(PDO::ATTR_CURSOR => PDO::CURSOR_SCROLL));
$stmt->execute();
print $stmt->rowCount();
?>
 
http://msdn.microsoft.com/en-us/library/ff628154%28v=sql.105%29 

migrate access to sql server 2005

Preface

Prerequisites
·         .Net Framework Version 2.0
·         SQL Server 2005 (Express, Standard, Enterprise) installed
·         MS Access (2000,2002,2003) file to be migrated
·         MS Visual J# Version 2.0
·         SQL Server Migration Assistant (SMAS)

Download Links
·         .Net Framework Version 2.0
·         SQL Server 2005
·         MS Visual J# Version 2.0
·         SSMA for Access

Assumptions
·         .Net Framework Version 2.0 is installed
·         SQL Server 2005 is installed and remote connections are enabled

How-To

Instructions
1.     Log into your SQL Server 2005 data source
2.     Right click Databases and click “New Database…”
3.     In the “Database Name” field, enter the name of the database that you would like to create and press “OK” when done
4.     Download MS Visual J# Version 2.0 from the download link above
5.     Install MS Visual J# Version 2.0
6.     Download SQL Server Management Services (SMAS) from the download link above
7.     Install SSMA
8.     Start the SSMA application
9.     Create a new project by clicking File > New Project … or click the New Project icon
10.  Give the project a name and location of where to save the project file like Figure 1

Figure 1


11.  To preserve primary key numbering
a.     Click Tools > Project Settings
b.     Click the “Migration” link
c.     Change “Keep Identity” to true see Figure 2


Figure 2 - You can change other settings here to match your desired database environment

12.  Press “Apply” and “OK”
13.  Add your MS Access file to the SSMA project by clicking the “Add Files” graphic  in the upper left of your SMAS screen
14.  Under the Access Metadata Explorer, you can now expand the tree to see all of the objects related to this Access file and then click the name of database to make sure all of your objects are highlighted

Figure 3


15.  Add your SQL Server 2005 connection to the SSMA project by click the “Connect to SQL Server” graphic  in the upper left
16.  Enter your database server, database name, authentication, user name and password to connect to your SQL Server 2005 instance in Figure 4

Figure 4

17.  You will see in the SQL Server Metadata Explorer, the list of databases available to your SQL Server.  Click the name of the database you will be importing the MS Access data into

Figure 5

18.  From your Access Metadata Explorer, click the name of your Access database and then click the “Convert Schema” graphic
19.  Along the bottom, you will see the output panel start outputting the conversions of the schema in Figure 6

Figure 6

20.  From your SQL Server Metadata explorer, expand “dbo” tree and then expand the “Tables” tree and you will see that the converted schema was loaded into the database in Figure 7


Figure 7

21.  Now right-click the “Tables” folder that is above the tblTest table icon and from the options window you will see an option that says “Load to Database” or click the  graphic.  This will create and modify all of the tables that you have loaded into the schema and place them into the database as table objects.
22.  From your Access Metadata explorer, left click the “Tables” folder under your Access file tree see Figure 3
23.  You will see the “Migrate Data” graphic  become enabled
24.  Click “Migrate Data” and the data from your Access database will be exported into SQL Server 2005
25.  A report of the completed tasks will pop up, press close and your migration is complete

Kutipan Membangun -Albert Einstein-

-  Jika A adalah 'sukses', maka rumusnya adalah 'A=X+Y+Z', dimana X adalah 'kerja',
   Y adalah 'bermain', dan Z adalah jaga mulut anda agar tetap tertutup.
-  Cobalah tidak untuk menjadi seseorang yang sukses, tetapi menjadi seseorang
    yang bernilai.
-  Saya tidak memiliki bakat tertentu. Saya hanya ingin tahu.
-  Satu-satunya sumber pengetahuan adalah pengalaman.
-  Pelepasan tenaga atom telah merubah segalanya kecuali cara kita berpikir.
    pemecahan untuk masalah ini  tergantung kepada hati nurani umat manusia.
    Jika saya mengetahuinya, lebih baik saya menjadi pembuat jam tangan.
-   supaya kamu berhasil langgarlah peraturan peraturan yang ada, lakukan
     yang menurut kamu benar
-   hidup seperti naik sepeda agar tidak terjatuh kamu harus tetap bergerak
    yang terpenting adalah tidak berhenti bertanya.
-   jika anda ingin mendapatkan hasil yang berbeda tetapi masih melakukan
     hal yg sama itu namanya terori yg   gila.jika anda ingin sesuatu hal yg berbeda
     maka lakukan lah hal yg berbeda pula.
     -Albert Einstein-

      Set Static IP Fedora 15


      Had some trouble setting a static IP address using Network Manager in Fedora 15 on Virtual Box. after searching around this is what worked for me.
      Turn off NetworkManager from startup (we’ll be using network instead):

      # chkconfig NetworkManager off
      Turn on network manager on start up:

      #chkconfig --level 35 network on
      Create the start up scripts for your devices. Ensure you know the device name “ethX” and the MAC address:

      #cd /etc/sysconfig/network-scripts/
      
      #vi ifcfg-ethX (Your device number where "X" is)
      
      add the following lines with your network information
      BOOTPROTO=none
      HWADDR=Your_hardware_address
      DNS1=192.168.1.1
      GATEWAY=192.168.1.1
      IPADDR=192.168.1.2
      NETMASK=255.255.255.0
      ONBOOT=yes
      TYPE=Ethernet
      IPV6INIT=no
      USERCTL=no
      NM_CONTROLLED=no
      DNS2=8.8.8.8
      PREFIX=24
      
      Stop NetworkManager and start network

      #service NetworkMananger stop
      
      #service network start
      
      #ifconfig
      **If you might have to install network if you haven’t previously done so.

      #yum install system-config-network
      And that’s it… pretty simple but it took some searching to find a solution for me…
      Thanks!

      Broadcom 43xx Chipset and Ubuntu 11.04 (Natty Narwahl)

      Just upgraded my 3-year old laptop (HP Pavilion dv9760ed) to Ubuntu 11.04.  Apparently things went just fine and in a small hour the update completed. Bad thing: my wifi was not working anymore :( . The wifi card on my laptop is based in the Broadcom 4311 Chipset.

      First thing i did was checking my PCI devices available. This can be done with te command below. The filter “14e4″ will display only devices manufactured by Broadcom (including wifi cards)

      ~$ lspci -vvnn | grep 14e4

      The result should be something like this:

      02:00.0 Network controller [0280]: Broadcom Corporation BCM4311 802.11b/g
      LP-PHY [14e4:4315] (rev 01)

      lshw is a small tool to provide detailed information on the hardware configuration of your machine.

      ~$ lshw -C network

      Below you see the output of this command. As you can see the Broadcom device is DISABLED

        *-network DISABLED
             description: Wireless interface
             product: BCM43224 802.11a/b/g/n
             vendor: Broadcom Corporation

      First thing you can try is to activate the proprietary driver under: System > Administration > Hardware/Additional Drivers. Pay attention that this action requiers a working Internet connection (e.g. wired) This did’t do the tric for me. Still no working wifi :(

      You can manualy install some packages to get a working wifi connection. I’ve downloaded the following packages:

          B43-fwcutter; Utility for extracting Broadcom 43xx firmware
          Firmware-b43-installer; Installer package for firmware for de b43 driver

      I use 64-bits Ubuntu. If you use a different architecture, the linked webpages provide the right packages voor you with al little search. Attention: the firmware installer also needs an working Internet connection. When installing it will download some source files (somewhere from openwrt.org)

      Installing is very simple. As i use Gnome desktop i can dubble click the packages to install the. The ‘Ubuntu Software Center’ window will open en then just hit the install button. Thats al. B43-fwcutter package must be installed first.

      After installation everything works fine! However this is not a very user friendly way of upgrade/installation of Ubuntu. The majority of ‘standard’ users will be scared of when this problem occurs.

      Some screens of the installation of the above packages

      B43-fwcutter installation Firmware-B43-installer installation


      To get a temporarily Internet connection i plugged in my laptop in a free port of my router.

      install libre Office di fedora

      kemaren udah ngebahas openoffice sekarang ngebahas libreoffice..apa itu libreoffice..LibreOffice adalah sebuah paket aplikasi perkantoran yang kompatibel dengan aplikasi perkantoran besar seperti Microsoft Office atau OpenOffice.org dan tersedia dalam berbagai platform. Tujuannya adalah menghasilkan aplikasi perkantoran yang mendukung format ODF tanpa bergantung pada sebuah pemasok dan keharusan mencantumkan hak cipta. Nama LibreOffice merupakan gabungan dari kata Libre (bahasa Spanyol dan Perancis yang berarti bebas) dan Office (bahasa Inggris yang berarti kantor). Sebagai sebuah perangkat lunak bebas dan gratis, LibreOffice bebas untuk diunduh, digunakan, dan didistribusikan. LibreOffice merupakan proyek pengembangan dari OpenOffice.org yang sejak tahun 2010 sudah diakuisisi oleh Oracle. Semua fitur yang ada di OpenOffice ada pula di LibreOffice tetapi ke depannya akan dikembangkan secara lebih terbuka dan mandiri karena dibawah naungan pengembang....perpisahan

      INSTALASI

      Secara default baik libreoffice maupun openoffice belum terinstall di fedora 15, anda bisa dowload paket sourcenya, download libreoffice disini

      extract paket libreoffice dengan menggunakan perintah berikut:

      terminal:

          tar xvzf LO_x.x.x-_Linux_x86_install-rpm_en-US.tar.gz

      masuk ke dalam folder extract

          cd /Downloads/en-US

      install paket RPM dengan menggunakan perintah berikut

          rpm -ivh *rpm

      menampilkan menu libreoffice, ketikkan perintah berikut

          cd /Downloads/en-US/RPMS/desktop-integration

      sekarang install libreofficenya

          rpm -ivh *rpm

      LibreOffice sudah terinstall, untuk cara yang lebih mudah, anda bisa menginstall libreoffice dengan mengetikkan perintah di bawah ini

          yum groupinstall "Office/Productivity"

      namun libreoffice-base belum terinstall di dalamnya, ketikkan perintah berikut untuk menginstall libreoffice-base

          yum -y install libreoffice-base

      Semoga bermanfaa

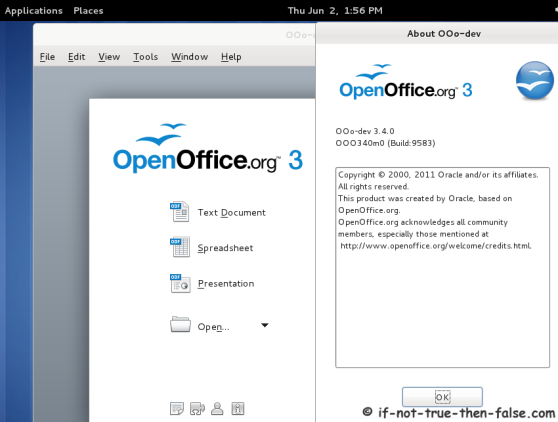
      Install OpenOffice.org 3.3.0/3.4.0 on Fedora 15/14, CentOS/Red Hat (RHEL) 5.6/6

      OpenOffice.org adalah aplikasi perkantoran yang kini banyak digunakan oleh perusahaan baik di Indonesia maupun negara lainnya, hal ini dikarenakan aplikasi perkantoran ini mempunyai kemampuan multiplatform dan dapat digunakan dibanyak Sistem Operasi baik itu Microsoft Windows, Linux maupun Macintosh. Selain itu OpenOffice.org menggunakan basis Open Source sebagai basis pengembangannya membuat aplikasi ini cepat berkembang dan gratis.
      Pada saat ini OpenOffice.org telah mencapai versi 2.0 dimana kemampuan yang dimilikinya sudah sangat jauh berbeda dengan versi-versi sebelumnya termasuk kemampuannya untuk memanfaatkan teknologi OpenDocument (odt) yaitu teknologi yang membuat dokumen dapat digunakan secara bersama-sama tidak saja berbeda sistem operasi, melainkan berbeda gadget/alat seperti Personal Computer, Personal Digital Assistant, Smartphone dan lain-lain.
      Dengan banyaknya kemampuan yang dimilikinya OpenOffice.org ini, maka OpenOffice.org sangat tepat dipelajari dan dijadikan aplikasi perkantoran andalan anda dimasa depan.
      Untuk mempelajari lebih jauh aplikasi OpenOffice.org bisa donlot modul pelatihannya di website saya, gratis buat personal atau modul kursus.


      1. Download OpenOffice.org 3.3.0/3.4.0 Beta Linux Package
      OpenOffice.org 3.3.0 32-bit version

      wget http://download.services.openoffice.org/files/stable/3.3.0/OOo_3.3.0_Linux_x86_install-rpm-wJRE_en-US.tar.gz

      OpenOffice.org 3.3.0 64-bit version

      wget http://download.services.openoffice.org/files/stable/3.3.0/OOo_3.3.0_Linux_x86-64_install-rpm-wJRE_en-US.tar.gz
      2. Extract Package and Access Directory

      tar -xvf OOo_3.3.0_*

      cd OOO330*
      ## OR ##
      cd OOO330_m20_native_packed-1_en-US.9567/

      3. Install / Update OpenOffice.org RPM packages

      rpm -Uvh RPMS/*.rpm RPMS/desktop-integration/openoffice.org3.3-redhat-menus-3.3-*.rpm

      4. setup melalui GUi

      ./setup

      5.remove

      yum remove openoffice.org*


      semoga bermanfaat..

      Perintah Sudo

      Secara default, fedora menggunakan perintah “su” untuk mengakses hak root. Jadi bila ingin melakukan suatu operasi yang memerlukan hak root, cukup gunakan


      $ su -c "perintah"
      sebagai perintah.
      Terbiasa dengan ubuntu style? Mudah saja, ada beberapa langkah yang perlu dilakukan untuk mengaktifkan fitur itu.

      1. Edit file /etc/sudoers


      $ su -c "visudo"
      2. Edit pada baris yang berisi


      ## Allows people in group wheel to run all commands
      # %wheel        ALL=(ALL)       ALL
      ## Same thing without a password
      # %wheel  ALL=(ALL)       NOPASSWD: ALL

      Bila ingin sudo tetap meminta password, maka aktifkan baris yang


      %wheel        ALL=(ALL)       ALL

      dengan menghilangkan tanda pagar. Namun bila ingin tanpa password (berbahaya) aktifkan baris


      %wheel  ALL=(ALL)       NOPASSWD: ALL
      Save dengan cara tekan esc, :, w, q
      Lalu tambahkan user yang ingin bisa menggunakan sudo kedalam grup wheel


      $ su -c "useradd -G wheel nama_user" 
      Done. Sekarang user yang sudah masuk group wheel bisa melakukan perintah sudo.

      install mp3 plugins fedora 15

       
      Procedure

      Here is a basic procedure for installing the Fluendo MP3 plugin for GStreamer:

      1.  Visit Fluendo Webshop and click on "Fluendo MP3 Decoder."
      2.  Click on "Add to Cart" button and follow by "Checkout" button.
      3.  Sign in either as a new customer or returning customer. Continue                Checkout Procedure to confirm this order. After confirming your order, you can download the codec in various formats. The most comfortable option is RPM.
       4.   If you've downloaded the file as an RPM, just double-click and install it.   Otherwise, extract the tarball and read the documenation/INSTALL.mp3.txt.

          $ ls
          fluendo-mp3-1.i386.tar.bz2
          $ tar -jxvf fluendo-mp3-1.i386.tar.bz2
          fluendo-mp3-i386/
          fluendo-mp3-i386/libgstflump3dec.so
          documentation/INSTALL.mp3.txt
          documentation/LICENSE.mp3.txt
          $ ls
          documentation  fluendo-mp3-1.i386.tar.bz2  fluendo-mp3-i386
          $ cd fluendo-mp3-i386/
          $ ls
          libgstflump3dec.so

       Basically, you need to create a plugins directory under $HOME/.gstreamer-0.10 then copy the binary over.

          $ mkdir -p $HOME/.gstreamer-0.10/plugins
          $ cp libgstflump3dec.so $HOME/.gstreamer-0.10/plugins
          $ chcon --type=textrel_shlib_t $HOME/.gstreamer-0.10/plugins/*.so

      The last step may not be necessary if selinux is disabled.If selinux is enabled, make sure that executable stacks are enabled (see System > Administration > SELinux Management > Boolean > Memory Protection > Allow unconfined executables to mark their stack executable).
          Now, you should be able to play MP3 files using GStreamer applications such as Totem Movie Player, Rhythmbox Music Player, Banshee Music player or the Elisa Media center.

      repository fedora 15 lokal singo

      Jika anda pengguna fedora, di SINGO sudah menyediakan repository untuk fedora. Repo untuk fedora 15 pun sudah tersedia di SINGO . Silahkan arahkan repo fedora anda ke SINGO 
      Berikut saya tampilkan langkah-langkah mengganti source repo ke SINGO
      backup dulu file settingan repo

      #cp  /etc/yum.repos.d/fedora.repo /etc/yum.repos.d/fedora.repo.old
      #cp/etc/yum.repos.d/fedora-updates.repo /etc/yum.repos.d/fedora-updates.repo.old

      kosongkan isi dari file settingan repo
      #echo “” > /etc/yum.repos.d/fedora.repo
      #echo “” > /etc/yum.repos.d/fedora-updates.repo


      Edit file settingan repo tersebut
      #vi /etc/yum.repos.d/fedora.repo

      Masukkan list dibawah ini ke dalam file /etc/yum.repos.d/fedora.repo tersebut
      [fedora-singo]
      name=Fedora
      baseurl=http://singo.ub.ac.id/fedora/releases/$releasever/Everything/$basearch/os/
      enabled=1
      gpgcheck=1
      gpgkey=file:///etc/pki/rpm-gpg/RPM-GPG-KEY-fedora-$basearch
      Dan masukkan list dibawah ini ke dalam file /etc/yum.repos.d/fedora-updates.repo
      [fedora-singo]
      name=Fedora
      baseurl=http://singo.ub.ac.id/fedora/releases/$releasever/Everything/$basearch/os/
      enabled=1
      gpgcheck=1
      gpgkey=file:///etc/pki/rpm-gpg/RPM-GPG-KEY-fedora-$basearch
      Setelah file repo di setting, jalankan perintah dibawah ini untuk menerapkan perubahan

      #yum clean all
      #yum update
      #yum list

      Mengembalikan Panel Gnome Ubuntu Yang Hilang

      Bukalah terminal dengan shortcut alt+f2 pada posisi kursor anda di desktop. Setelah terbuka terminal ketik perintah berikut:

      sudo debconf gnome-panel

      Perintah di atas akan mengembalikan panel gnome anda langsung, namun dalam hak acces root, setiap file yang anda download atau buat hanya bisa diakses oleh root. Namun setidaknya dengan panel ini anda bisa menggunakan aplikasi kembali terutama aplikasi browsing supaya dunia kembali terang.

      Kemudian downloadlah script berikut untuk merestore kembali panel anda dengan hak akses akun anda. Download dan extrak filenya (PanelRestore.sh), taruh didestop biar mudah mencarinya. Untuk memastikan bahwa file tersebut tidak hanya root aja yang memiliki akses ada baiknya gunakan perintah chmod dulu pada filenya. sudo chmod 777 /home/useranda/Desktop/PanelRestore.sh. sebelum anda mengklik atau mengeksekusi file hasi download tersebut. Tutuplah terminal yang membuka gnome panel root.

      Selamat mencoba dan semoga artikel ini bisa membantu mengatasi sedikit masalah anda dengan ubuntu.

      sumber

      Extra Packages for Enterprise Linux (EPEL)

      Welcome to the home of the EPEL Special Interest Group.

      What is Extra Packages for Enterprise Linux 

      Extra Packages for Enterprise Linux (or EPEL) is a Fedora Special Interest Group that creates, maintains, and manages a high quality set of additional packages for Enterprise Linux, including, but not limited to, Red Hat Enterprise Linux (RHEL), CentOS and Scientific Linux (SL).
      EPEL packages are usually based on their Fedora counterparts and will never conflict with or replace packages in the base Enterprise Linux distributions. EPEL uses much of the same infrastructure as Fedora, including buildsystem, bugzilla instance, updates manager, mirror manager and more.
      Learn more about EPEL in the EPEL FAQ
       

      What packages and versions are available in EPEL? 


      You can take a look on any of the available EPEL mirrors from our mirror list
      Alternately, you can browse the package set using repoview:

      How can I use these extra packages? 


      EPEL has an 'epel-release' package that includes gpg keys for package signing and repository information. Installing this package for your Enterprise Linux version should allow you to use normal tools such as yum to install packages and their dependencies. By default the stable EPEL repo is enabled, there is also a 'epel-testing' repository that contains packages that are not yet deemed stable.
      If you are running an EL6 version: epel-release-6-5.noarch.rpm
      NOTE: You need to also enable the 'optional' repository to use EPEL packages as they depend on packages in that repository.
      If you are running an EL5 version: epel-release-5-4.noarch.rpm
      If you are running an EL4 version: epel-release-4-10.noarch.rpm
      You can verify these packages and their keys from the Fedora project's keys page: https://fedoraproject.org/keys
       

      History and background of the project 


      The EPEL project was born when Fedora maintainers realized that the same infrastructure that builds and maintains packages would be great to also maintain add on packages for Enterprise Linux. Much of the early need was driven by what Fedora infrastructure needed on the RHEL machines that built and maintained Fedora. From there things have grown to a large collection of varied packages. See our history and Philosophy page for more information.

      How can I contribute? 


      The EPEL SIG is always looking for interested folks to help out. We always need package maintainers, qa/testers, bug triagers, marketing and documentation writers. Please see our Joining EPEL page for more information on how to join the SIG.

      Communicating with the EPEL SIG 


      There are many ways to communicate with the EPEL SIG and it's members:
      • The #epel irc channel on irc.freenode.net offers real-time support for EPEL users and developers.
      • The epel-announce mailing list is a low volume mailing list for only important announcements.
      • The epel-package-announce list is a list that gets information about package updates as they happen in the stable repository.

      Install virtualbox 4.x on ubuntu fedora

      VirtualBox supports a large number of guest operating systems:
      • Windows 3.x
      • Windows NT 4.0
      • Windows 2000
      • Windows XP
      • Windows Server 2003
      • Windows Vista
      • Windows 7
      • DOS
      • Linux (2.4 and 2.6)
      • Solaris
      • OpenSolaris
      • OpenBSD
      UBUNTU

      edit file repo nya..
      gksudo vi /etc/apt/sources.list
      tambahkan baris ini
      deb http://download.virtualbox.org/virtualbox/debian natty contrib
      Save dan exit
      wget -q http://download.virtualbox.org/virtualbox/debian/oracle_vbox.asc -O- | sudo apt-key add -
      Update Source
      sudo apt-get update

      Install
      sudo apt-get install virtualbox-4.0


      FEDORA

      2. Install Fedora or RHEL Repo Files

      cd /etc/yum.repos.d/
       
      ## Fedora 15/14/13/12 and RHEL 6 users
      wget http://download.virtualbox.org/virtualbox/rpm/fedora/virtualbox.repo
       
      ## CentOS 5.6 and RHEL 5.6 users
      wget http://download.virtualbox.org/virtualbox/rpm/rhel/virtualbox.repo
       
      atau 
      su -c 'curl http://download.virtualbox.org/virtualbox/rpm/fedora/virtualbox.repo > /etc/yum.repos.d
      /virtualbox.repo; sed -i "s,enabled=0,enabled=1,g" /etc/yum.repos.d/virtualbox.repo' 
       

      3. Update latest packages

      yum update
       
      atau
      su -c 'yum update; yum install -y VirtualBox-4.0 dkms gcc' 
       
      Note: restart jika anda update kernel.

      4. Install following dependency packages

      yum install gcc kernel-devel kernel-headers

      ## PAE kernel users install ##


      yum install gcc kernel-PAE-devel kernel-headers


      5. Install VirtualBox Latest Version (current 4.1.0)

      yum install VirtualBox-4.1

      6. Add VirtualBox User to vboxusers Group

      usermod -a -G vboxusers user_name 


      7. Start VirtualBox

      VirtualBox

      login root di GUI

      Di fedora 15 login sebagai root di GUI tidak bisa.dan bisa di akalin dengan sedikit konfigurasi..
      PERINGATAN: - Sebenarnya tidak baik untuk login sebagai root dari GUI. Ini BERBAHAYA. TAPI jika ada orang ingin tahu bahwa cara untuk login sebagai root dari GUI kemudian ikuti petunjuk ini.

      Di Fedora 15 Anda tidak dapat login sebagai root dari gui. Dengan default, hanya user normal yang diizinkan untuk login dari modus gui.

      Saya Berhasil Login sebagai root dari GUI pada Fedora 15. Ikuti langkah-langkah dan Anda akan mampu Login sebagai root dari GUI pada Fedora 15

      Jika Anda ingin login sebagai root dari GUI di Fedora 15 maka Anda harus mengedit file / etc / pam.d /
      Step 1 :- [ardy@bundanarty]$ su – root
      Password:-

      Step 2:- masuk ke /etc/pam.d/ directory.
      [root@ask4itsolutions]# cd /etc/pam.d/
                                          # cp gdm gdm.bkp

      Step 3 : edit file gdm dengan editor kesukaan kalian
      [root@ask4itsolutions pam.d]# vi gdm

      cari baris ini..hapus atau beri komentar saja
      auth required pam_succeed_if.so user != root quiet


      Step 4 :- Save & Exit

      Step 5 :-cp gdm-password gdm-password.bkp

      [root@ask4itsolutions.com pam.d]#vi gdm-password

      cari baris ini..hapus atau beri komentar saja 
      auth required pam_succeed_if.so user != root quiet

      Step 6 :- Save & Exit .

      reboot dan coba

      Thanks.semoga bermanfaat


      install flash player di fedora dan centos

      # sudo -i
      ## OR ##
      # su 
       
       Install Adobe YUM Repository RPM package 
       
      # rpm -ivh http://linuxdownload.adobe.com/adobe-release/adobe-release-i386-1.0-1.noarch.rpm
      # rpm --import /etc/pki/rpm-gpg/RPM-GPG-KEY-adobe-linux 
       
      Update Repositories
       
      # yum check-update
       
      Untuk Fedora 15, Fedora 14, Fedora 13, Fedora 12 and Red Hat (RHEL) 6 
       Fedora 15/14/13/12 and Red Hat (RHEL) 6 32-bit version (i686)
       
      # yum install flash-plugin nspluginwrapper alsa-plugins-pulseaudio libcurl 
      -------------------------------------------------------------------------------
      

      Fedora 15/14/13/12 and Red Hat (RHEL) 6 64-bit version_ (x86_64) (32 bit wrapped version) 

       #yum install flash-plugin nspluginwrapper.x86_64 \
      nspluginwrapper.i686 alsa-plugins-pulseaudio.i686 libcurl.i686

       DICENTOS 5.5 dan 5.6 / CentOS and Red Hat 32-bit version (i386)

      # yum groupinstall "Sound and Video"
       
      # yum install flash-plugin nspluginwrapper curl
       
      edit  /etc/yum.repos.d/CentOS-Base-i386.repo 
       
      [base-i386]
      name=CentOS-5.6 - Base i386
      baseurl=http://mirror.centos.org/centos/5/os/i386/
      gpgcheck=1
      gpgkey=file:///etc/pki/rpm-gpg/RPM-GPG-KEY-CentOS-5
       
      install
       
      # yum install flash-plugin nspluginwrapper alsa-utils.i386 \ 
      # sox.i386 vorbis-tools.i386 curl.i386 alsa-utils.x86_64 \ 
      # sox.x86_64 vorbis-tools.x86_64 curl.x86_64


      Apa itu Load Balancing ??

      Secara harafiah, load balancing adalah pembagian beban menjadi
      seimbang (balance). Begitu juga artinya dalam dunia internet, server
      farm, dan jaringan komputer, load balancing adalah proses distribusi
      beban terhadap sebuah servis yang ada pada sekumpulan server atau
      perangkat jaringan ketika ada permintaan dari pengguna. Maksudnya
      adalah ketika sebuah sever sedang diakses oleh para pengguna, maka
      server tersebut sebenarnya sedang dibebani kerena harus melakukan
      proses terhadap permintaan para penggunanya. Jika penggunanya
      banyak, maka proses yang dilakukan juga menjadi banyak.

      Session-session komunikasi dibuka oleh serber tersebut untuk
      memungkinkan para penggunanya menikmati servis dari server
      tersebut. Jika satu server saja yang dibebani, tentu server tersebut
      tidak akan dapat melayani banyak pengguna karena kemampuannya
      dalam melakukan processing ada batasnya. Batasan ini bisa berasal
      dari banyak hal, misalnya kemampuan processing-nya, bandwidth
      internetnya, dan banyak lagi.

      Untuk itu, solusi yang paling ideal adalah dengan membagi-bagi beban
      yang datang tersebut ke beberapa server. Jadi, yang berugas
      melayani pengguna tidak hanya terpusat pada satu perangkat saja.
      Inilah yang disebut sistem load balancing.

      Misalnya ketika Anda mengakses ke situs www.detik.com, maka web
      server yang berisi dokumen-dokumen berita, akan langsung melayani
      Anda. Server tersebut memberikan apa yang Anda minta dengan
      membuka komunikasi menggunakn servis HTTP port 80. Informasi
      halaman utama akan langsung dikirimkan ke PC melalui port 80
      tersebut, sehingga Anda dapat melihatnya di halaman browser.

      Ketika Anda meng-klik suatu link pada halaman web tersebut,
      permintaan Anda kemudian diproses kembali oleh server. Web server
      akan melayani permintaan Anda lagi dengan berbagai cara yang telah
      ditentukan oleh pengelolanya, apakah mengarahkan Anda kedalam
      folder tertentu, menjalankan script-script tertentu, mengirimkan
      gambar, memutar klip suara, dan banyak lagi. Pada saat ini, server
      detik.com sedang terbebani oleh permintaan Anda. Hingga halaman
      atau layanan yang Anda minta terbuka, maka selesailah proses
      tersebut dan server kembali bebas dari beban.

      Jika yang mengakses halaman web www.detik.com hanya Anda
      seorang, tentu sistem load balancing tidak diperlukan, karena sebuah
      server tentu masih sangat cukup untuk melayani permintaan Anda.
      Namun apa jadinya jika www.detik.com dibuka oleh hampir sebagian
      besar pengguna internet di Indonesia, setiap detik, dan setiap hari
      seperti keadaan saat ini. Mungkin sebuah server saja tidak akan
      sanggup melayani permintaan seberat itu. Permintaan akan terus
      datang dan proses juga akan terus-menerus dilaku

      Cerita tentang 32-bit dan 64-bit

      Bingung mau pilih Windows yang mana untuk dipakai di rumah? Atau mau mulai mengikuti trend 64-bit? Coba baca dulu ini sebelum mengambil keputusan. Mudah2an bermanfaat.:D
      Ilustrasi
      Si Bolang dan Si Aming sedang berada di Mangga Dua, Jakarta. Setelah pegal mencari-cari spare part computer dan menawar2 harga selama berjam2, akhirnya PC impian mereka selesai dirakit juga.

      Berikut spek computer mereka secara umum :

      Komputer Bolang
      ----------------
      Prosesor dual core
      2 GB RAM
      VGA OnBoard

      Komputer Aming
      ---------------
      Prosesor quad core terbaru
      8 GB RAM
      VGA Gaming terbaru


      Setelah itu mereka terlibat percakapan tentang sistem operasi windows apa yang akan mereka install ke dalam PC mereka masing-masing.

      Bolang : Ming, lu udah tau mau install windows apa? Windows XP atau Vista?
      Aming : Gua sih ga suka yang ribet2 Lang, gw mau yang standar lah…XP aja.
      Bolang : Lu mau install yang XP 32 bit apa 64 bit?
      Aming : Hah apaan tuh? Gw kagak ngarti…yang gw tau windows tu XP, Vista
      Bolang : Ahh ga gaul lu Ming…makanya belajar dong biar cepet pinter!
       

      Fakta-fakta # 1
      Kebanyakan orang awam tidak mengerti tentang Windows 32 bit atau 64 bit.
      Aming : wah gak ngarti gw yang begituan Lang…gw mah yang pasti2 aja deh…
      Bolang : ah..payah lu Ming.. spek computer lu doank yang keren! Tapi lu sendiri ga bisa  mengoptimalkan computer lu sampe maksimal. Makanya jgn maen game online mulu!
      Aming : ya lu ajarin gw dong Lang. Gw cocoknya pake yang mana nih?
      Bolang : siip gw ajarin ya skrg

      OK. Sekarang anggaplah komputer itu adalah sebuah mobil.. mobil Si Bolang bisa kita ibaratkan adalah sebuah Honda Jazz. 
      Sedangkan mobil Si Aming bisa kita ibaratkan dengan sebuah Pagani Zonda.

      Lalu sekarang kita anggap Windows 32 bit adalah jalan biasa, dan Windows 64 bit adalah jalan tol bebas hambatan.
      Sekarang mari kita terjemahkan keinginan mereka menginstall versi Windows yang mereka inginkan dengan spek komputer yang mereka punya.

      Fakta-fakta # 2
      Windows 32-bit hanya support memory max. 4 GB.
      Windows 64-bit support memory max 192 GB. WOW!


      Apabila Bolang menginstall Windows 32 bit ke dalam komputernya, semuanya akan berjalan dengan baik-baik saja. Honda Jazz yang dibawa ke dalam jalanan kota. Pilihan yang tepat mengingat Bolang hanya punya memory 2 GB. Tapi karena VGA Bolang adalah onboard alias makan memory fisik, ada baiknya Bolang menambah memory lagi supaya lebih lancar.

      Akan tetapi apabila Si Aming menginstall Windows 32 bit ke dalam komputernya, semuanya juga akan berjalan dengan baik2 saja, tapi pilihan ini mempunyai beberapa kelemahan. Ibarat mobil sport super Pagani Zonda yang sangat cepat dibawa ke dalam jalanan kota, potensi penuhnya tidak akan terlihat. Oleh karena itu untuk memaksimalkan hardware yang dia punya, sebaiknya Aming memakai Windows 64-bit. Apabila Aming memakai Windows 32 bit, maka memorynya yang 8 GB tidak akan terdeteksi sepenuhnya (4 GB RAM sia-sia! numpang mejeng aje di dalam casing


      Fakta-fakta # 3
      Windows Vista/Seven x64 lebih baik daripada Windows XP x64. Ini karena Windows XP x64 sebenarnya adalah jelmaan Windows Server 2003!

       
      Sekarang Si Aming memilih untuk menginstall Windows 64 bit. Tapi Windows 64 bit yang mana? XP? Vista? Seven? Menurut pengalaman penulis, dukungan program dan driver Windows Vista/Seven x64 lebih baik daripada Windows XP x64. Penulis suatu waktu pernah ingin menginstall software bawaan digital camera di Windows XP x64, tapi tidak berhasil, ada pesan error: Not supported for this OS. Tetapi saat penulis menginstall di Windows Vista x64, tidak ada masalah sama sekali!
      Usut punya usut ternyata Windows XP x64 adalah jelmaan Windows Server 2003, dan memang di CD digital camera itu tertulis : For Windows XP and Vista. (Tidak ada Windows Server 2003 kan?!)


      Sekarang harga memory sudah sangat murah. Bandingkan dengan jaman dulu waktu 1 keping DDR1 128 MB saja harganya bisa 250 ribu!
      Makin banyak memory yang terinstall di komputer kita, makin lancar kegiatan komputasi kita, karena kebutuhan Windows untuk virtual memory semakin berkurang. Memory fisik dan memory virtual bagaikan langit dan bumi.

      Mungkin memory ideal untuk jaman sekarang adalah 4 GB. Ini karena sekarang program2 makin rakus memory, terutama game dan software design/multimedia.

      Fun Facts! Di software motion graphic, Adobe After Effect, di sistem yang sama2 punya memory 4 GB, apabila memakai windows 32-bit, memory yang bisa dipakai hanya 2 GB. Sedangkan di windows 64-bit, memory yang bisa dipakai seluruhnya 4 GB. Ini bisa dilihat di 'splash screen' pada saat membuka program tsb.
      Contoh : Bila kita membeli sebuah VGA card baru, tentunya kita diberi sebuah CD berisi driver untuk VGA tersebut. Namun seringkali driver tersebut adalah driver 32 bit.

      Bila anda memutuskan untuk memakai Windows 64 bit, downloadlah driver 64 bit terbaru dari vendor hardware anda.
      ----------------------
      Ok, sekarang kita kembali lagi ke Bolang dan Aming.

      Bolang : Gimana Ming, lu udah ngarti belum?
      Aming : Udah Lang..tapi gw masih ada pertanyaan nih. Bisa nggak gw pake dua2nya 32 bit ama 64 bit?
      Bolang : Ya bisa dong. Pake dual boot.
      Aming : Gimana caranya tu Lang?
      Bolang : Lu googling aja deh!


      Akhirnya sampai di rumah, si Aming menginstall Windows Vista 64 bit.
      Sesudah itu, Aming :

      • membuka Firefox untuk ngaskus
      • buka Photoshop buat ngedit gambar pertamax
      • download film pake IDM
      • dengerin lagu pake iTunes
      • Jalanin bot RO
      • Chating pake YM
      • main game Call of Duty Modern Warfare 2,
      Jangan ada yang protes ya! Aming kan punya memory 8 GB & Quad core terbaru! Dilarang ngiri!:D


      Bagaimana Memeriksa Processor x86 (32-bit) atau x64 (64-bit) pada Windows?

      install pidgin di ubuntu

      Pidgin adalah multi account Messenger Instant. Pidgin ini mendukung ICQ, IRC, MSN, Gtalk, SILC, Jabber, AOL dan banyak lainnya.

      Anda dapat men-download Pidgin untuk Windows, Mac, CentOS dan Fedora dari halaman download.

      Untuk menginstal Pidgin 2.8.0 di Ubuntu 11.04 Natty Narwhal, ketik perintah berikut di terminal anda:

      sudo add-apt-repository ppa:ferramroberto/pidgin
      sudo apt-get update
      apt-get install pidgin


      CARA MUDAH MENGGANTI GRUB UBUNTU 

      sudo add-apt-repository ppa:danielrichter2007/grub-customizersudo apt-get update
      sudo apt-get install grub-customizer

      Masih Ketergantungan sama Windows

      mahasiswa itu emang ga pernah lepas dengan yang namanya Windows..ckck
      padahal lagi coba-coba mainin linux....

      sudo add-apt-repository ppa:ubuntu-wine/ppa
      sudo apt-get update
      sudo apt-get install wine1.3

      Terpaksa de....

      HAPUS MENU SHORCUT APPLIKASI

      Saya pernah mencoba menginstall program-program under Windows di Ubuntu. Namun saya merasa tidak nyaman, mengapa?
      Yach...nanti jadi nggak opensource lagi, nggak freeware lagi dong. Trus akhirnya saya uninstall deh program-program under Wine tersebut.
      Tapi saya merasa risi karena Wine beserta program-programnya masih nampak di menu.
      Setelah bingung dan googling akhirnya saya menemukan caranya. Berikut caranya:
      Menu program tersebut biasanya untuk per-user disimpan dibawah

      $HOME/.config/menus/applications-merged/

      dan

      $HOME/.local/share/applications/wine/Programs/

      Tinggal hapus (delete) aja program Wine beserta program-program di bawahnya.
      Jadi bersih deh dari Wine dan nggak jadi mabuk lagi. 

      Cek directory berikut:

      ~/.local/share/desktop-directories
      ~/.local/share/applications/wine
      ~/.config/menus/applications-merged

      hapus yang berhubungan dengan aplikasi wine yang diremove. Kalau perlu
      buang iconnya juga sekalian cek directory:

      ~/.local/share/icons  


      UNINSTALL WINE 

      sudo apt-get remove wine
      rm -rf $HOME/.wine
      rm -f $HOME/.config/menus/applications-merged/wine*
      rm -rf $HOME/.local/share/applications/wine
      rm -f $HOME/.local/share/desktop-directories/wine*
      rm -f $HOME/.local/share/icons/????_*.xpm


      simpan gambar di vb.net dengan type bloob di mysql


      Dim connstr As String
      connstr = "server=localhost;user id=root;password=;database=aldie;"

                  Try
                      'membaca isi steram
                      fs = New FileStream(currfile, FileMode.Open, FileAccess.Read)

                      'mendapatkan ukuran file
                      ukuran = fs.Length
                      Dim rawdata() As Byte = New Byte(ukuran) {}
                      fs.Read(rawdata, 0, ukuran)
                      fs.Close()

                      Dim sql As String = "select * from jenisbarang"
                      conn = New MySqlConnection(connstr)
                      conn.Open()

      adapter = New MySqlDataAdapter(sql, conn)
      Dim cmdbuilder As MySqlCommandBuilder = New MySqlCommandBuilder(adapter)
      Dim ds As DataSet = New DataSet("jenisbarang")

                      'mengsi data adapter
                      adapter.Fill(ds, "jenisbarang")

                      Dim row As DataRow = ds.Tables("jenisbarang").NewRow()
                      row("kdjenis") = txtkdjenis.Text
                      row("nmjenis") = txtnmjenis.Text
                      row("nama_file") = Path.GetFileName(txtphoto.Text)
                      row("ukuran") = ukuran
                      row("file") = rawdata

                      'meemasukan row
                      ds.Tables("jenisbarang").Rows.Add(row)
                      'menyimpan perubahan ke database
                      adapter.Update(ds, "jenisbarang")
                      MsgBox("data berhasil di masukan", MsgBoxStyle.Information, "insertok")
                      mycn.tutupkoneksi()
                      bersihkantext()

      'clear textbox dan piccturebox
       txtkdjenis.Text = "" : txtnmjenis.Text = ""
       txtphoto.Text = "" : txtkdjenis.Focus()
       Catch ex As Exception
       MsgBox("failed to insert : " + ex.Message)
       End Try


      narsis dikit ga papa kan..hehe
      Related Posts with Thumbnails